
How To Use Fabric Scraps to Create Brand New Fabric
Do you have a lot of fabric scraps lying around? Don't throw them away!
In this tutorial, I will show you how to turn them into a beautiful and original piece of fabric that you can use for any creative project. You will need some basic sewing skills and a sewing machine. The process is not quick but it is fun and so rewarding - the result will be well worth the effort. Let's get started!
If you are looking for a creative and eco-friendly way to make your own fabric, you might want to consider reusing synthetic fabrics. Synthetic fabrics are made from chemicals derived from petroleum products, and they have some advantages over natural fabrics. They are strong, lightweight, wash at a low temperature, are quick to dry, and don't crease easily. They also have a smooth and shiny appearance that can add some sparkle to your projects.
However, synthetic fabrics also have a downside. They cause a lot of environmental problems, such as air and water pollution, and they do not biodegrade easily. That is why it makes sense to reuse them instead of throwing them away. So let's begin turning your old synthetic fabrics into something new and beautiful.
Materials
- Lightweight non-stretchy fabric such as cotton or muslin for base layer.
- Assorted scraps. These can be cotton, wool, synthetics, yarn, etc
- Voile fabric for the top layer - this is a great way to repurpose old voile curtains or other sheer semi-transparent fabric. This top layer can be any colour you like depending on the effect you want to create. For example using a dark blue fabric on top will show less of the scraps beneath and add a blue tint all over, where as using a more transparent white voile will let more of the fabrics pieces show through, and create a more pastel-coloured effect.
- Sewing machine thread.
- Glue stick (optional)
You will also need these tools
- Sewing machine
- Sharp scissors
- pins
- clips
Here are the steps to make your fabric scraps to make new fabric
Step 1
Cut out base layer fabric. This should be a light to medium weight material with no stretch. For this example the fabric measures 30cm by 35cm. You could choose to make it bigger or smaller to suit your project but the fabric should be at least 5cm longer and wider than you need to allow for shrinkage caused by stitching, and to make it easier to cut round pattern pieces.
Step 2
Look out fabric scraps. Cut them into small pieces or different shapes and arrange them on top of the cotton base fabric. This is fun! You can spend ages arranging them or throw them on in a random fashion. You can also choose between covering the base layer completely or letting some of it show through.

My scraps have a fresh spring colour palette and there's still some white fabric showing. I've chosen to loosely mirror the placement of the scraps from the centre because I will be making a small rabbit doll that has two pieces cut on the fold.
Step 3
Attach the scraps to the base layer with a glue stick. I used Hobbycrafts acid free but other brands are available...and no, they are not sponsoring me! The challenge here is to keep your fingers free of glue to avoid dirty marks transferring to the fabric.

Step 4
Place voile fabric over the base layer to make a fabric sandwich. It should cover the base fabric completely, overlapping by 5mm all the way round.

Step 5
Use clips along the long edges, and a few fine dressmakers pins to hold the fabrics together. The pins should be used sparingly so as not to damage the fine voile fabric.

Step 6
Use a new fine needle in your sewing machine to avoid snagging the voile.
Stitch through all the layers of the fabric scrap sandwich, taking care to remove the clips and pins as you go. I've used a simple grid of straight white stitches but you can be as creative as you like with choices of thread and stitch. If your machine has inbuilt embroidery stitches experiment with those and if you're able to lower the feed dog, even better you can create all kinds of free motion embroidery squiggles and swirls.

Step 7
When you've finished the stitching stage, trim and neaten all edges with your sharp scissors and you're new fabric is ready to use!

You have just created a unique piece of fabric that is not only beautiful but also eco-friendly. You have reused fabrics and saved them from landfill. You have also reduced your environmental impact by avoiding buying new fabrics. Congratulations!
More examples of the recycled scrap fabric being used in creative projects.
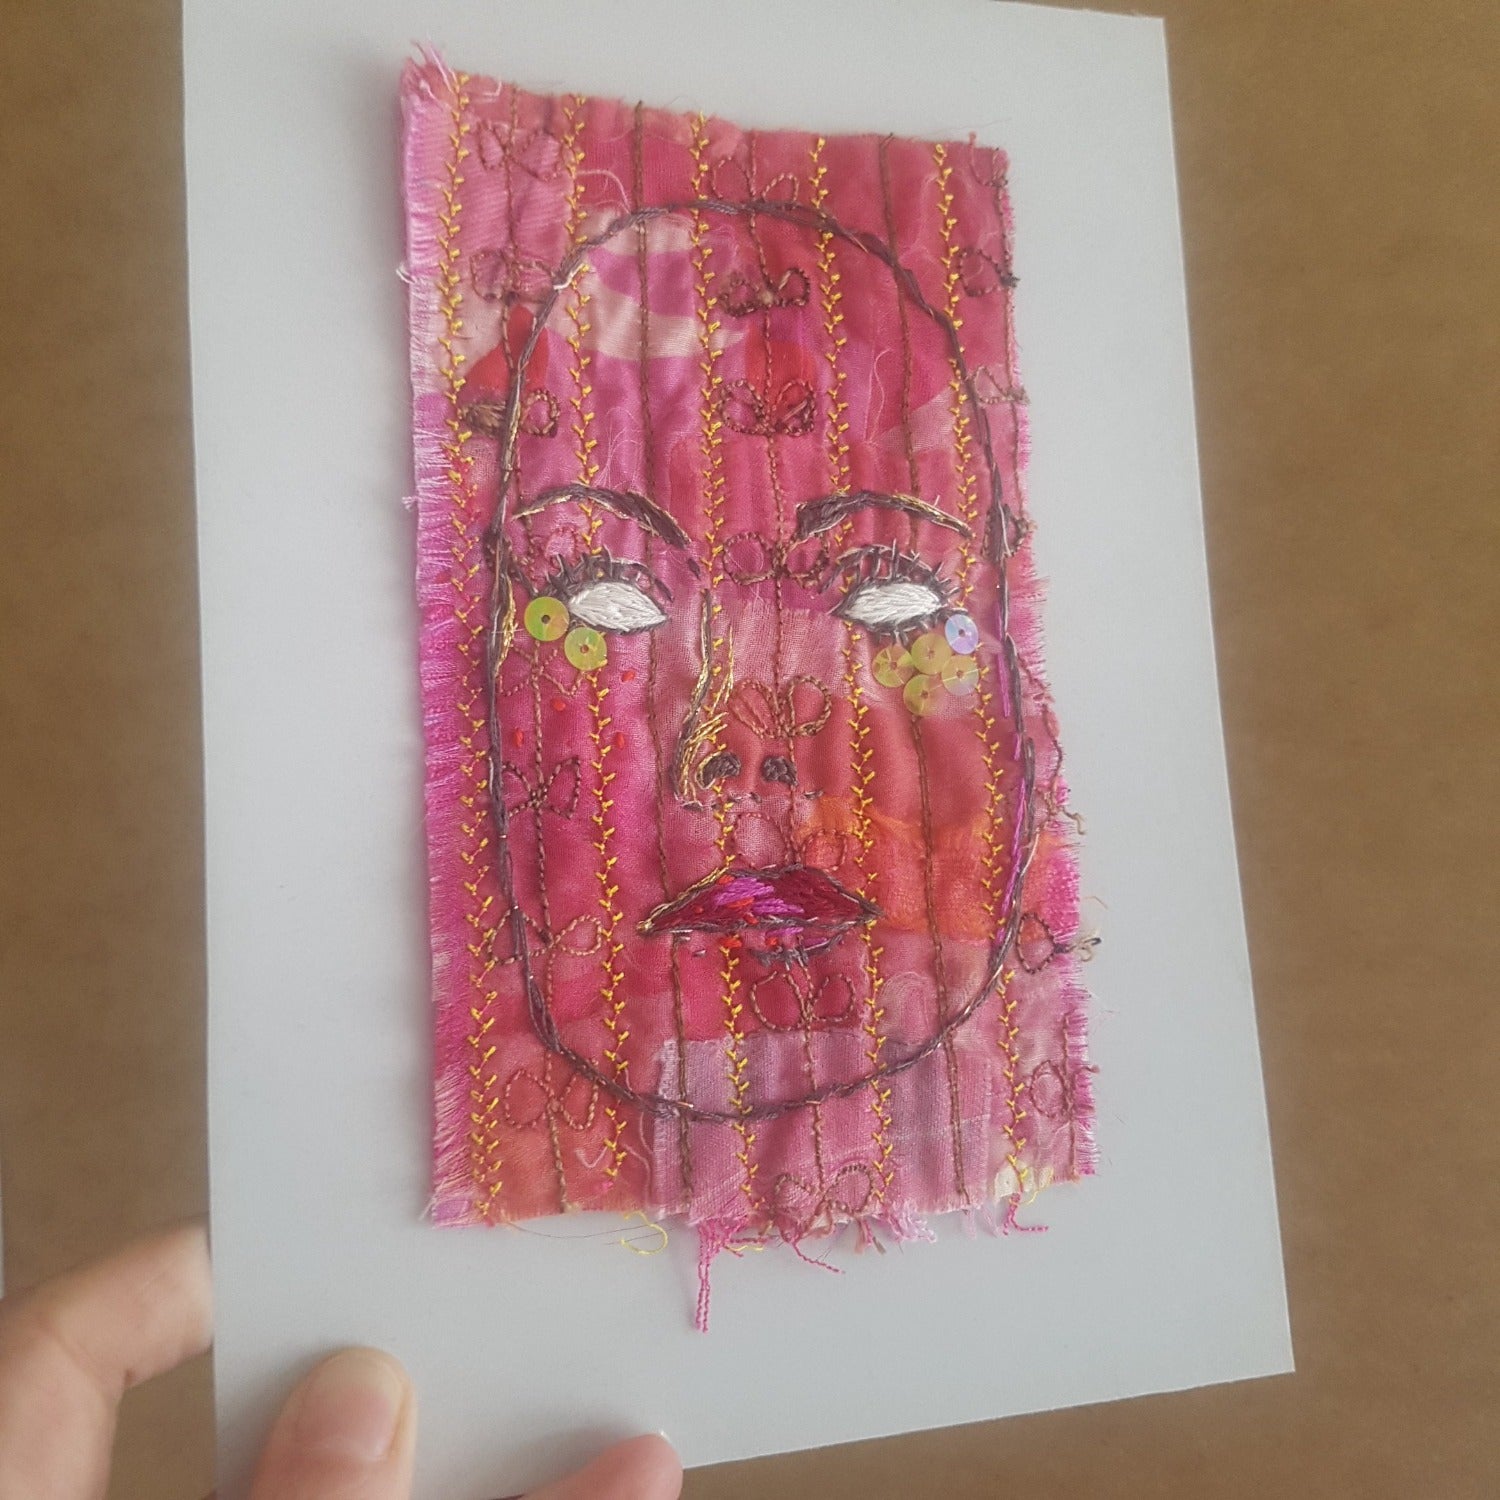
For this textile art piece Who Is Behind The Mask, I used pink voile over various pink and orange fabrics, then stitched the layers together with a combination of the in-built embroidery stitches in my sewing machine and free motion embroidery. Then I hand-embroidered the eerie face and finally added the sequins for a bit of bling.


